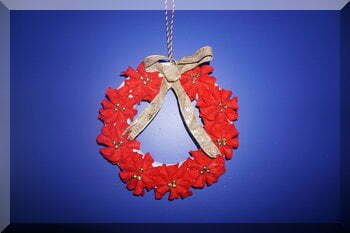
So, I have made it and the five and seven year olds both helped a little, and I think it looks ok. Once I got it figured out, it wasn’t too hard to make but it did take some thinking as the instructions were lacking in some areas.
Making the wreath
Ok, to make this wreath, you need a few things. In the magazine, the instructions are actually divided into two as you can just make the poinsettia flowers to hang or you can use those flowers to make the wreath.
Putting the two lists together, you will need: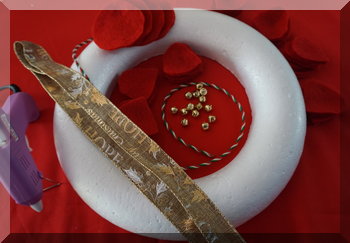
- red felt (about 12 cm by 90 cm in total – it can be in different dimensions)
- a 23cm flat bottomed polystyrene wreath (it took me time to find a large one and mine is actually 29cm thus the extra felt and bells I used)
- Christmas ribbon
- string (I used Christmas coloured rope instead)
- 21 small bells (I used 27)
- a hot glue gun and glue
Making the flowers
This is the trickiest part of making the wreath and certainly is not child friendly because of the hot glue.
First step is to cut out eight tear-shaped petals and one circle for each of the seven (or nine in my case!) flowers. The pattern in the magazine needed to be made larger so I free handed it.
My hint is to cut out a few of the paper templates so you don’t have to pin the templates quite so often! I certainly folded the material in half so I could cut two at once – there are at least 56 petals to cut out!
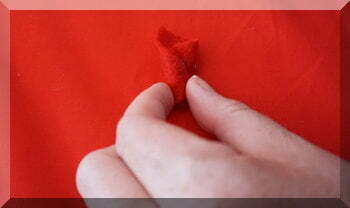
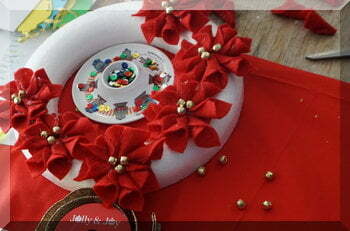
The magazine told me to glue each petal like a cone. With some experimenting, I can tell you that you need to keep the pointed end of the petal outwards and fold the curved end over.
Then add some glue and fold over the other curved side.
It is fiddly and I had my fingers in hot glue a number of times so please don’t give this to young children to do!
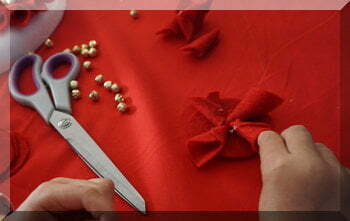
The next part if much easier – glue eight curled petals onto a circle of felt. You can lay them out perfectly around the circle by doing them in pairs on either side of the circle, but I found it much easier to add them side by side when the kids helped me as they had trouble getting the points centred otherwise.
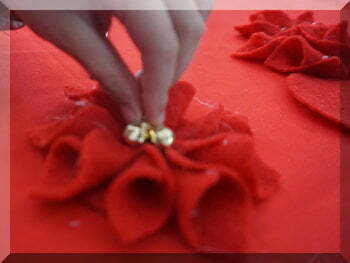
Add three dobs of hot glue in the entre of the flowers and stick a bell on each one. This my five and seven year olds did manage and enjoying.
By now, you can clearly see the flowers and my daughter called them amazing! The big advantage of the hot glue gun is how quickly the glue is set – no wasted time waiting for things to dry.
Putting the wreath together
The next part is easy – lay all the flowers on your wreath, adjusting the spacing until they all fit nicely and cover most of the wreath.
One by one, hot glue a flower onto the wreath until all are in place. Then, glue a bow of the ribbon into the gap between the last two flowers. You can tie a bow then just glue it on (or glue on the ribbon then tie a bow), but I glued it into place and to form a bow so I know it won’t come undone.
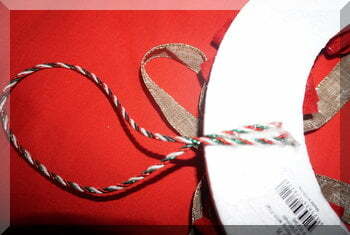
Turn the wreath over and hot glue a length of string onto the wreath to form a hanging loop.
All that’s left to do now is hang it! Or wrap it to give as a gift I suppose.




A first comment from on of the lurking types! 😉
I will seize the opportunity to tell you that I thoroughly enjoy reading your blog. Your projects are very inspirational (although making this wreath sounds out of my league!) AND I really love your writing style and sense of humour.
Merry Xmas and blessings to you and your family from your silent German reader.
Hi Nam, and thanks for taking that step to leave a comment 🙂
The wreath wasn’t really that hard (for an adult anyway) so if you like crafts, maybe give it a go!
This is super cute! It looks really fun to make! I wonder what it would look like with a green contrasting ribbon wrapped around the foam base before gluing on the flowers. Maybe next year I’ll whip one up to see if it helps the flowers pop even more. 🙂 I love the fact you used jingle bells so that the door jingles when you open it!
It’s a very good questions, Sterlingjay. I think it needs something to cover up the white underneath and have thought of painting it red or green – green ribbon underneath would work well. If you make one, I’d love to see photos of it 🙂
I think I will also add some more bells onto the ribbon so it jingles more next year!
wow. this is a great diy and i think it looks really good.
Thanks Val 🙂
Super cute wreath! When I was a kid we made ornaments in a similar way to this, except each poinsettia was its own little ornament, and it had a plastic jewel in the middle. I think the fabric we used was some sort of gold lame so they were more star-like. I love the bells though- currently I have bells on my Christmas wreath and I love the tinkling sound when the door opens.
Thanks Rachel 🙂
Gold lame would make some pretty like flowers/stars – no reason you couldn’t add bells to them instead of the red felt! So you had a lot of poinsettias rather than an actual wreath when you made them as a kid? I imagine they would look really pretty spread over a Christmas tree.
This is adorable! I will definitely consider making this next Christmas! My daughter will be 3 1/2 by that time and I’m sure she won’t be a ton of help, but this seems like it would be a fun Christmas decoration that we could work on together.
Thanks Callen 🙂
3 1/2 is a bit young for this one but maybe she could help colour the wreath before you stick everything on. Of you could dot around some glue and get her to sprinkle glitter over the top for a sparkly wreath 🙂 There are other ideas on this blog that will better suit her age, though, like the Christmas stars, scented sachets and paper lanterns.
I have already started collecting craft ideas for this year’s holidays. My family has a little bit of a tradition where we make all our own presents and decorations, and each year we try to shake it up a little with new ideas. Thanks for sharing this article.
Variety is the spice of life as they say, Clair 🙂 My kids absolutely loved making that wreath and are still proud of it when they spot it in the cupboard!
I like the looks of this one. This really brings back memories of my mother’s house when I was growing up. She would have the poinsettias everywhere around and it really brings out the holidays well, especially with that bright red color.
Wow, I’ve never seen poinsettias around a house for Christmas – they just aren’t big Down Under (maybe because they are cold season flowers?) except in pictures and decorations. I don’t even remember them in pictures from when I was a kid! It’s so interesting to hear how different Christmases can be, even when so much is similar.