As well as all the decoration ideas for a community group Christmas tree, I collected some ideas for the tree itself and for making the most of the decorating experience. So here are those ideas in another post for you 🙂
Again, many of these ideas were inspired by the 1st Facebook Scout Group, so thanks again to those leaders.
ideas for the tree and surrounds
- make a tree shape by lashing poles together – it can be a simple tepee shape or more advanced with branches off a main stem
- use an old canvas tent to form the tree, using something like an umbrella stand to hold it up
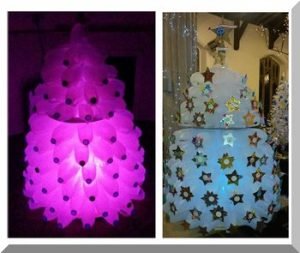
- stack 2 litre plastic milk bottle in layers to form a tree shape. You can stick a badge or picture over each lid as decoration and insert a light inside the pile
- whittle old wooden tent pegs to form a tree (in miniature) or the branches (on a bigger tree)
- stack up some old wooden pallets to form a tree shape – simple, rustic and effective!
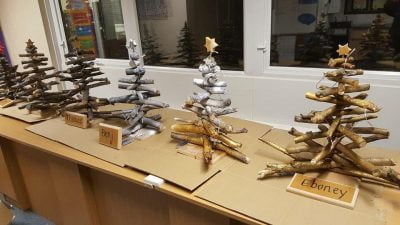
- collect some sticks then lash them together in an appropriate shape. Spray white paint across the top and sprinkle over some glitter
- get the youth to collect some sticks (about 5mm thick) and cut them to size. Drill a hole in the middle of each stick and place them over a threaded rod (or straight wooden rod) attached to a wooden base. Spray paint or drizzle with glitter, maybe add some battery powered fairy lights or thin tinsel.
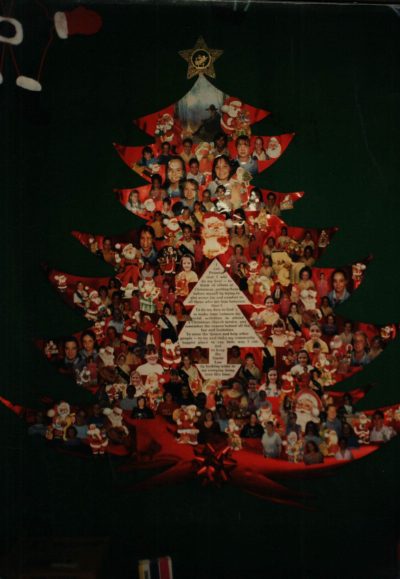
- cut a tree shape out of thick cardboard (shiny gives a nice effect!) and attach it to a wall or divider. From there, it can be decorated however you like, but some ideas are to cover it with a photo of each person in the group and have a feature in the middle (Christmas song/poem, group photo, group logo, photo of your hall, etc), cut photos of everyone into bauble size and shape to stick on the tree, get everyone to put a paint handprint on it, or let the kids decorate it with textas and glitter.
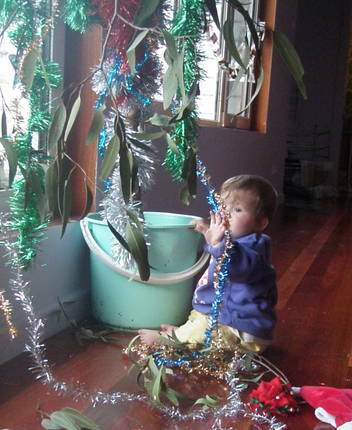
- use some old branches to form a natural looking tree – I once used a gum tree branch that way on our house. You can make this as small or as large as suits your space, too.
%22%20transform%3D%22translate(.8%20.8)%20scale(1.67969)%22%20fill-opacity%3D%22.5%22%3E%3Cellipse%20fill%3D%22%23100000%22%20rx%3D%221%22%20ry%3D%221%22%20transform%3D%22matrix(-51.66898%20-6.52731%2017.52457%20-138.72129%20197%2095)%22%2F%3E%3Cellipse%20fill%3D%22%23939c99%22%20rx%3D%221%22%20ry%3D%221%22%20transform%3D%22matrix(77.33717%20-11.55166%2022.02846%20147.4782%2054.7%2053.5)%22%2F%3E%3Cellipse%20fill%3D%22%239b204b%22%20cx%3D%22194%22%20cy%3D%22255%22%20rx%3D%2260%22%20ry%3D%2271%22%2F%3E%3Cellipse%20fill%3D%22%23b9c8c4%22%20cy%3D%2234%22%20rx%3D%2229%22%20ry%3D%2253%22%2F%3E%3C%2Fg%3E%3C%2Fsvg%3E)
- collect some old LPs and add a photo or picture over the label of each one. Heat the record until the sides curve up and in to form a bowl of sort. Use a hot glue gun to join the ‘bowls’ to form a pyramid tree. decorate it with a bit of tinsel or just drizzle glue and glitter over it all.
A similar option would be to keep the records flat and glue them onto a wire frame to form the tree. - create a tree by gluing lids (plastic milk bottle lids, metal or plastic jar lids or metal drink bottle lids) onto a frame or just to each other to create the shape.
ideas for sharing the experience
So instead of just one person, or two or three, coming up with an idea and implementing it, here are some better ways to make the group Christmas tree a community experience.
- get lots of people to give some input – you don’t have to be the creative one, and sometimes a group will brainstorm a much better idea than any one person thought of.
- take it in turns. For example, one scout group gets a different section to design the tree each year – it always has a scouting theme but different age groups have different designs so it stays interesting, everyone gets a go and the other sections get a surprise.
- allow time – maybe have one meeting for discussing and deciding on a theme and concept, and then another for making the tree, decorations, etc. For young children, an adult or two may need to put everything together, but older groups may need a third session for the construction and decoration!
- have two trees! Divide everyone into to groups and let each group decorate their own tree – maybe on inside and one outside, or one big tree to sit under and one small to be a table piece. Lots of options and more Christmas trees just mean more joy!
So, what ideas will you be using for Christmas tree decorating this year? Maybe you can start a new tradition in the groups you belong to, and leave the box of old decorations stored away instead.
* Photos courtesy of Love Santa, Andrew (a UK Scout leader) and Fiona (Harleston Guide leader) – thank you!


